PDF and ePub Creation for Publication
For publication to major print on demand and eBook vendors, you typically have to supply a print-ready PDF version of the book for print, or an ePub version of the book for eBook distribution. In this guide, we will go over the process to create PDF and ePub files through each of the applications we support.
It should be noted that many vendors are now accepting .DOCX versions of the file for both print and eBook, and will perform the conversion for you during the upload process. So if you use the Word version of the template, you may be able to simply upload the file as-is without the need to convert. Check with your vendor first.
PDF Creation for Print Publication
Most print on demand (POD) vendors require a PDF version of your book interior for print publication. Creating a PDF is easy in any application, as Word, Pages, and InDesign have built in PDF generation capabilities.
You may also use Adobe Acrobat to create even higher quality PDFs, in PDF/X-1a:2001 format, to assure the best results from any print on demand vendor. (We recommend Adobe Acrobat Pro.)
Microsoft Word Instructions (Windows)
To create a PDF of the template, click the file tab, save as option.
Select PDF (*.pdf) from the drop down under the file name.

After you select PDF (*.pdf) from the drop down under the file name, click the options link. This will open a new save as window. Ensure that PDF (*.pdf) is selected as the save as option.
Click the options button to open the options dialog box.
Click on PDF/A Compliant check box, to place a check mark in the checkbox. Click OK. (This will create a PDF/A format file that embeds fonts and graphics.)
Click save to create a PDF copy of the book in PDF format for publication.

Microsoft Word Instructions (Mac)
To create a PDF of the template, create a custom page size that is the same dimensions as the book's trim size in Pages. (You only have to do this step once for each trim size you wish to make PDFs of.)
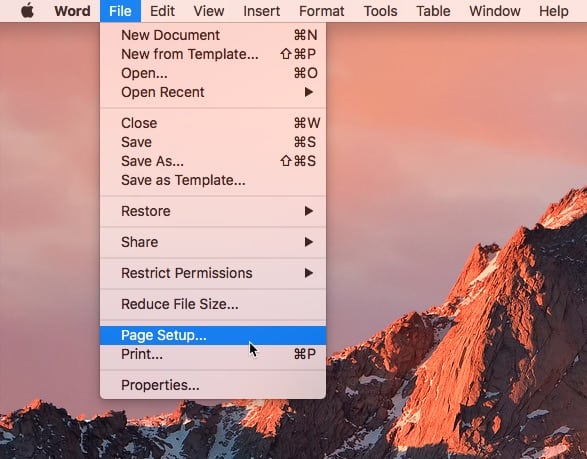
On the Word toolbar, click file, and then page setup.
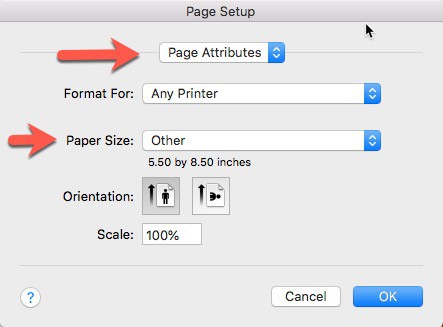
Select "Page Attributes" from the selection box. Select the paper size that matches your template's trim size from the paper size drop down. (For example, a 6x9" trim template, requires a 6x9" paper size.)
Click OK if the paper size is available.
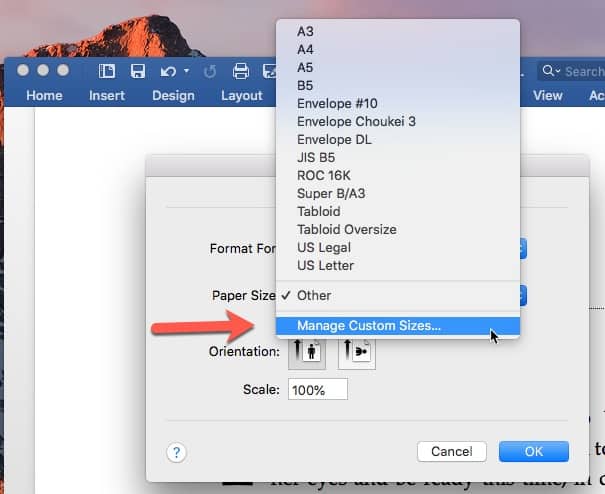
If the paper size for your trim is not on the list, click on the manage custom sizes option.
Click the plus icon to create a new custom size.
Set the paper width and height to match the trim size of your template.
Set all margins to 0 in.
Click OK.

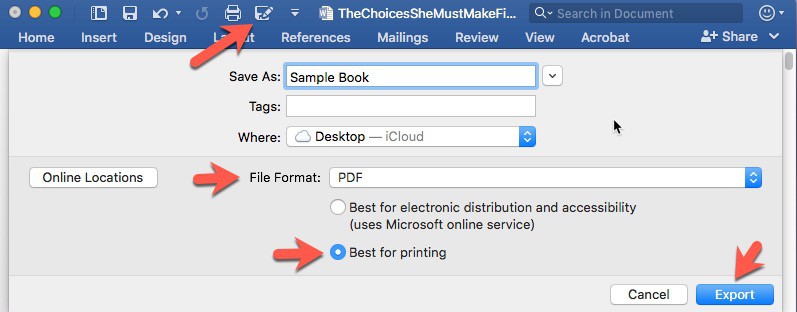
Once the page size has been set up, you may save your PDF from within Word using the save-as function to export a PDF.
Apple Pages Instructions
To create a PDF of the template, create a custom page size that is the same dimensions as the book's trim size in Pages. (You only have to do this step once for each trim size you wish to make PDFs of.)
On the toolbar, click file, and then page setup.

Select the paper size that matches your template's trim size from the paper size drop down. (For example, a 6x9" trim template, requires a 6x9" paper size.)
Click OK if the paper size is available.
If the paper size for your trim is not on the list, click on the manage custom sizes option.

Click the plus icon to create a new custom size.
Set the paper width and height to match the trim size of your template.
Set all margins to 0 in.
Click OK.
Once you have selected a custom paper size that matches your trim size, you can create the PDF.
Click on file on the toolbar and select export, then PDF.

Select the highest image quality option from the drop down.
Click next.

Select the location you wish to save the PDF.
Click export to create the PDF.
You may upload this PDF file to your POD vendor.

Adobe InDesign Instructions
To create a PDF in InDesign, click on the file menu from the toolbar and select export from the drop down.

Select Adobe PDF (Print) (*pdf) from the save as type drop down box.
Click save.

Select [PDF/X-1a:2001] from the Adobe PDF Preset drop down.
Click All in the pages section.
Click export.
This will create a print-ready PDF.

ePub Creation for eBook Publication
All major eBook vendors accept ePub formatted files for eBook distribution. The ePub format standard is easy to create, portable, and can be used on a multitude of devices from tablets and phones, to computer systems.
Some eBook vendors will also accept .DOCX formatted files and perform the conversion for you. This is a handy feature for users of our Microsoft Word templates, as it allows you to simply upload the .DOCX file directly to the vendor during the publication process. Please check with your eBook vendor first to see if they support this file type for upload. Otherwise, the use of a free 3rd party application to convert Word files to ePub is needed.
Prior to submission, we recommend validating your ePub file with the free IDPF validation tool. This will uncover any issues in the file. Access the tool here.
Microsoft Word Instructions
If your eBook vendor will not accept a direct upload of the .DOCX Word formatted file, you will need to download a third party application to create an ePub format file.
The easiest free tool to use is Calibre. We recommend using this application, as you can simply import your Word document, and click convert to make an ePub file. Download Calibre Here
When converting your book to ePub in Calibre, we suggest using the following settings.
Output format: EPUB
Table of Contents tab, check Force use of auto-generated table of contents.
Click OK to create the ePub.

Apple Pages Instructions
Converting Apple Pages templates to ePub is an easy process and is supported within Pages itself.
Click file on the toolbar, export to, and then ePub.

Enter the author name in the text box.
Click next.

Choose a file location for the ePub.
Click export to create the ePub file.
You may use this ePub at any major eBook distributor.

Adobe InDesign Instructions
To create a PDF in InDesign, click on the file menu from the toolbar and select export from the drop down.
Select EPUB (Reflowable) (*.epub) from the save as type drop down box.
Click save.

Select EPUB 2.0.1 from the version drop down.
Select Choose Image from the cover drop down.
Click the folder icon to find your cover image for the eBook. We recommend a cover that is 2000px on the longest side.
Choose Multi Level (TOC Style) from the Navigation TOC drop down.
Click OK to export to ePub.
